Sewing Supplies Part 2
by Mrs. Moriya Chesler
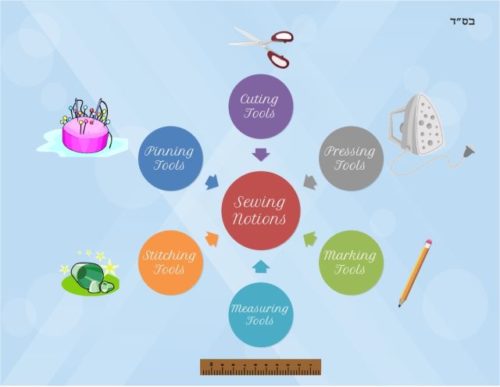
Sewing Notions, (c) by Mrs Moriah C.
This is a continuation of the last post on Sewing Notions.
- Stitching Tools
- Cutting Tools
- Measuring Tools
- Marking Tools
- Pinning Tools
- Pressing Tools
Hopefully, the picture above will be a memory aid for you.
Marking Tools
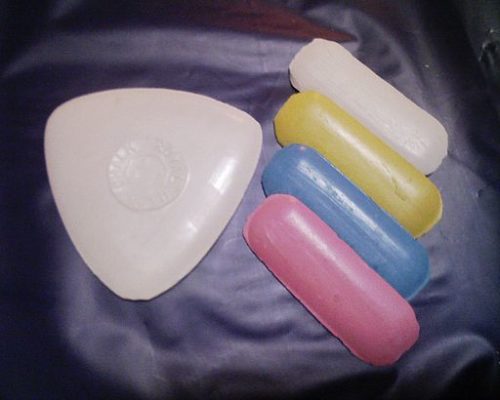
Tailor’s_chalks by Zenkota | Morguefile
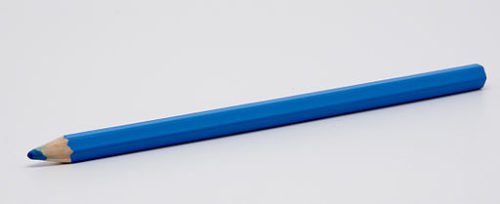
Blue_tailor’s_chalk by Clement Bucco-Lechat | Morguefile
Sometimes we need to transfer symbols and lines on a garment pattern onto fabric. To do this, we need specialized marking tools that are safe to use on fabric. The most common tools are chalk and fabric pens. The types of chalk used for marking fabric are triangular or resemble pencils. Some dressmakers use old, dry soap pieces to mark dark fabrics since they wash off easily and are recyclable for this project. Other fabric pens being marketed are not made with chalk but with erasable ink that washe with water or evaporate over time. There are also mechanical chalk pencils that have smooth thick chalk leads that don’t smudge and are more costly.
Another marking tool is a called a tracing wheel which resembles a mini pizza pie-cutter with serrated edges. It is used with colored chalk tracing paper to trace lines from the pattern onto the fabric. Do not use carbon tracing paper as they may stain the fabric. Only use those meant for fabric that wash off.
Sometimes we also use thread to mark special spots on the fabric such as along dart lines. We use a basting stitch and double thread to mark these lines so that they are easier to remove afterwords without any chalk marks.
Pinning Tools
Dressmaking and pins are like good friends. What uses can you think of for pins in the various stages of dressmaking?
- Pinning a pattern onto fabric
- Pinning fabric onto a dress form (headless torsos with felt coverings)
- Holding two layers of fabric together
- Marking hemlines and seamlines
- Placing appliques or pockets onto garment
There are various types of pins for various functions. The best kinds are the sharp, slender and smoothly finished. They are made of stainless steel or brass. Some have metal heads, others have round heads or T-shaped heads. Pins vary in their thicknesses usually from 0.45-mm to 0.7-mm. The thinner ones are used for sewing and quilting while the thicker ones are used for crafting. The thinnest pins (0.45-mm) are used for very lightweight and fine sheer fabrics.
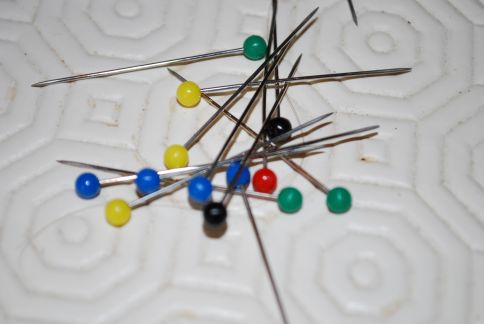
Ball-head pins by alexfrance | morguefile
Pins also come in various lengths from about 1-in to 2-in. The longer pins are used for quilting to pin layers of fabric. The average length pin, about 1 3/8-in long are used for sewing.
Here are some of the uses of these pins.
- Use silk pins for most fabrics. They are very thin (about 0.5-mm in thickness) and very sharp, and they come with metal or glass heads.
- Use ballpoint pins for knit fabrics. The plastic heads are usually very colorful.
- Use T-shaped heads for loosely woven, bulky or pile fabrics.
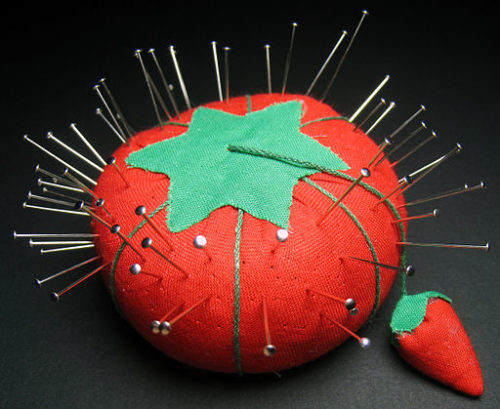
Silk pins in Strawberry_pincushion by DvortyGirl | Wiki Commons
Ball-head pins have rounded heads made of plastic or glass. The glass ones are heat-resistant and will not melt from the heat of an iron. These are super sharp and often used in sewing and quilting. The plastic ball-head pins are sometimes called pearlized pins and are not safe for use with an iron. They are for general crafting and sewing.
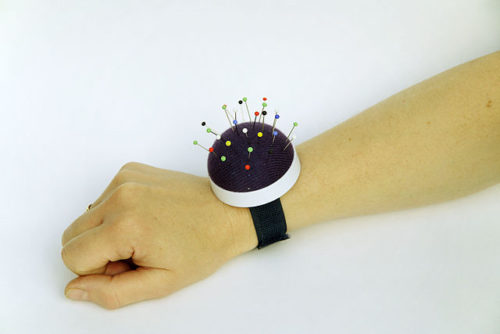
Wrist Pin Cushion by SteveK | Wiki Commons
So where are you going to store these pins? Make sure they are contained within safe limits. This is where the cute pin cushions come in. Pin cushions come in various shapes and sizes. The most common one is the ‘tomato’ pin cushion. Others can be worn on the wrist. An alternative to a soft pin cushion is a magnetic tray. A magnetic pin cushion provides a safer alternative as the pins will not fall out when the tray is overturned. In addition, the pins do not poke out of a soft pin cushion.
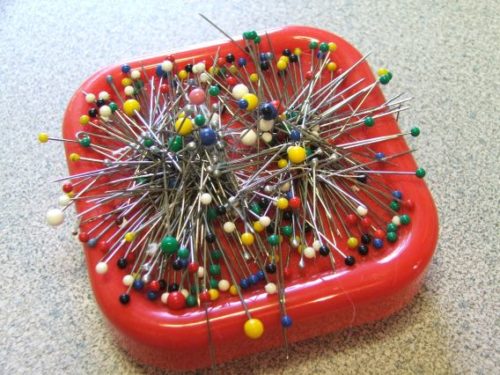
Assorted pins (silk and ball-head pins) on Magnetic Pin Cushion by ronnieb | morguefile
Pressing Tools
The grand finale of this post is what we call the pressing tools. Pressing, in contrast to ironing, is an up and down motion as opposed to ironing back and forth. It is a good habit to press pieces of your garment during dressmaking. Items that often need pressing include collars, sleeves and seams. The most common equipment used for pressing are an iron, an ironing board and press cloth.
Iron comes in all kinds of varieties based on temperature settings, steaming feature, plate design and coating. Like a cooking utensil, a more upscale iron may have a teflon coating to prevent glue from sticking to its sole (bottom) plate . An iron that has a water compartment to produce steam is ideal for use in sewing. Steam is useful when you want to press on a curvy area of your garment such as a sleeve cap or neckline and to mold bias tape onto a round edge. If you don’t have a steam iron, you can also use a spray water bottle filled with water to lightly wet the garment before ironing. An iron that is able to handle a variety of fabric types will have a wider temperature setting. It is a good idea to have an iron stand to place your iron on when not in use to absorb the heat. Not all irons come with an iron stand. You will have to buy it separately. Look for an iron with an automatic shut-off feature. Safety is of utmost concern whenever we use any electrical appliance.
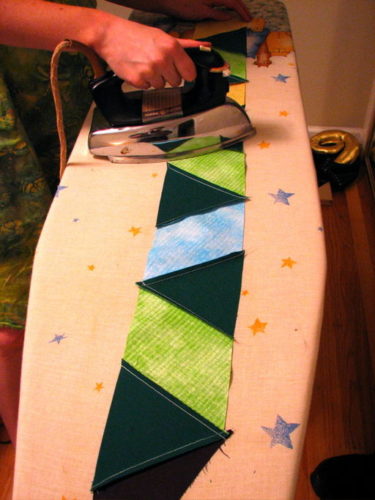
Iron and ironing board by L. MArie | Morguefile
When choosing an ironing board, look for one with a sturdy set of legs, easy-to-change board cover and thick surface padding. The board cover will get dirty over many uses and you will want to take it off to wash it. Do not place an ironing board in any place where a toddler may access it.
A press cloth is ideal to use between the iron and the garment in order to prevent scorching on fine fabrics, glossy or textured fabrics. Any cotton cloth or handkerchief will do. However, there are specially made press cloths that are treated before hand to press permanent pleats and tucks. An example is the Rajah Pressing Cloth that is chemically treated.
There are specialized equipment for pressing too. A narrow sleeve board shaped like a sleeve is used for pressing sleeves as a regular ironing board will not accommodate the opening of a sleeve. A point presser, usually made of wood and smaller than a sleeve board, has several specialized functions. Its sharp end is useful for pressing collar tips and its sides are useful for pressing curved and straight seams.
A seam roll is a long, firm tubular cushion that is used for pressing long seams and small curved areas. When a garment has a dart, for example, it is no longer flat but has a protrusion. It is much harder to press this on a flat surface like a regular ironing board. A shorter and rounder version of the seam roll, the tailor’s ham is used for pressing curved areas of a garment and curved seams.
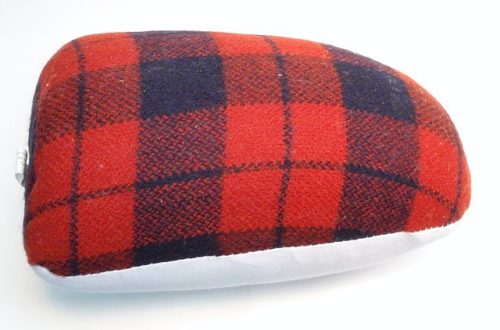
Tailor’s_ham Tenbergen | Wiki Commons
There are other sewing notions that I have probably missed, and will be introduced as they are needed in our sewing classes.
So, are you ready to start your first sewing lesson? Let’s try our first beginner lesson in the next posting. Please spread the word around to your friends who are interested in sewing for tznius as this is very important in creating your own tznius wardrobe that fits you and make our Father-in-Heaven proud.
